- How I Make a Damascus Knife with TuskBlade
Creating a Damascus steel knife is both an art and a science. The stunning patterns and high-performance qualities of a well-crafted Damascus knife make it one of the most sought-after blades. As a knife enthusiast and maker, I’ve had the pleasure of crafting my own Damascus knife using TuskBlade materials, which offer exceptional quality and consistency. Today, I’ll share my process for making a Damascus steel knife from start to finish.
- Gathering Materials and Tools
Before starting, I make sure I have all the necessary tools and materials. TuskBlade provides premium Damascus steel billets, which serve as the foundation for a high-quality blade. Here’s what I use:
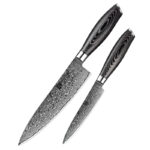
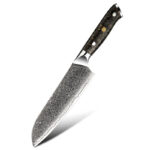
- TuskBlade Damascus steel billet – Known for its beautiful patterns and durability.
- Forge – To heat and shape the steel.
- Anvil and Hammer – For forging and refining the blade shape.
- Angle Grinder or Belt Sander – For shaping and grinding.
- Etching Solution (Ferric Chloride) – To reveal the signature Damascus patterns.
- Quenching Oil – For hardening the blade.
- Tempering Oven – To balance hardness and flexibility.
- Handle Materials – Wood, Micarta, or G10 for a comfortable grip.
- Epoxy and Pins – To secure the handle.
- Forging the Damascus Blade
The first step in making a Damascus knife is heating and shaping the steel billet:
- I heat the TuskBlade Damascus billet in my forge until it reaches a bright orange-yellow color (~2,100°F).
- Using a hammer and anvil, I shape the blade profile, ensuring a consistent thickness.
- After shaping, I normalize the blade by heating it and allowing it to cool slowly. This helps reduce internal stresses and prevents warping during quenching.
- Grinding and Profiling the Blade
Once the rough shape is forged, I refine it using a grinder:
- I grind the blade to its final shape, ensuring even bevels and a sharp edge profile.
- I gradually progress through different grit levels, from coarse to fine, to achieve a smooth finish.
- At this stage, I also drill holes in the tang if I plan to add a handle later.
- Hardening and Tempering
Heat treatment is crucial for a strong yet flexible knife:
- I heat the blade back up to its critical temperature (~1,500°F) and then quench it in high-quality oil to harden the steel.
- To prevent brittleness, I temper the blade in an oven at around 400°F for two hours, repeating the process twice for optimal toughness.
- Etching to Reveal the Damascus Pattern
This is my favorite part—bringing out the beautiful Damascus patterns!
- I clean the blade thoroughly to remove oils and debris.
- I submerge it in a ferric chloride solution for several minutes, allowing the acid to react with the steel and reveal the iconic wavy patterns.
- After etching, I neutralize the acid with baking soda and water, then lightly polish the blade.
- Attaching the Handle
For comfort and aesthetics, I attach a sturdy handle:
- I shape and sand the handle material to fit comfortably in hand.
- Using epoxy and pins, I securely attach the handle to the tang.
- Once dried, I sand and polish the handle for a smooth, ergonomic finish.
- Final Sharpening and Polishing
The last step is putting the finishing touches on my Damascus knife:
- I refine the edge using a whetstone and strop to achieve a razor-sharp finish.
- A final polish enhances the steel’s beauty and protects against rust.
Summary
Making a Damascus knife with TuskBlade materials is an incredibly rewarding process. From forging and heat treating to etching and final sharpening, each step contributes to a unique, high-performance blade. Whether you’re a knife maker or an enthusiast, using premium Damascus steel like TuskBlade ensures a superior knife with both functionality and aesthetics. If you’re passionate about craftsmanship, I highly recommend trying this process yourself!